kubernetes (K8s) 실습 환경 구성후 kubebench 진단
os ubuntu 20.04
| name | cpu | hard | memory |
| master | 4 | 40 | 4 |
| node1 | 2 | 20 | 2 |
| node2 | 2 | 20 | 2 |
기본 템플릿 os 세팅
#루트 계정 설정
sudo passwd root

#루트 계정 전환
su root

#방화벽 끄기
sudo ufw disable

#스왑메모리 끄기
swapoff -a
sudo sed -i '/ swap / s/^\(.*\)$/#\1/g' /etc/fstab

#hostname 확인 하기 호스트네임이 똑같으면 클러스터 구성시 하나의 노드로 인식
hostname
hostnamectl set-hostname XXX
reboot
도커와 쿠버네티스는 홈페이지 메뉴얼을 보고 설치 하는편을 권장
도커 : https://docs.docker.com/engine/install/ubuntu/
Install Docker Engine on Ubuntu
docs.docker.com
쿠버네티스 : https://kubernetes.io/ko/docs/setup/production-environment/tools/kubeadm/install-kubeadm/
컨테이너 런타임 (도커 설치)
저장소 설정
#HTTPS를 통해 리포지토리를 사용할 수 있도록 패키지 인덱스를 업데이트 하고 패키지를 설치
sudo apt-get update
sudo apt-get install ca-certificates curl gnupg

#Docker의 공식 GPG 키를 추가
sudo install -m 0755 -d /etc/apt/keyrings
curl -fsSL https://download.docker.com/linux/ubuntu/gpg | sudo gpg --dearmor -o /etc/apt/keyrings/docker.gpg
sudo chmod a+r /etc/apt/keyrings/docker.gpg

#리포지토리를 설정
echo \
  "deb [arch="$(dpkg --print-architecture)" signed-by=/etc/apt/keyrings/docker.gpg] https://download.docker.com/linux/ubuntu \
  "$(. /etc/os-release && echo "$VERSION_CODENAME")" stable" | \
  sudo tee /etc/apt/sources.list.d/docker.list > /dev/null
도커 엔진 설치
최신 버전의 엔진 설치
# 패키지 업데이트
sudo apt-get update

# 최신 버전 설치
sudo apt-get install docker-ce docker-ce-cli containerd.io docker-buildx-plugin docker-compose-plugin
특정 버전의 엔진 설치
# 특정 버전 설치

# 사용가능한 버전 출력
apt-cache madison docker-ce | awk '{ print $3 }'

#5:24.0.0-1~ubuntu.22.04~jammy
#5:23.0.6-1~ubuntu.22.04~jammy
#<...>

#원하는 버전을 선택하고 다음을 설치합니다.

VERSION_STRING=5:24.0.0-1~ubuntu.22.04~jammy
sudo apt-get install docker-ce=$VERSION_STRING docker-ce-cli=$VERSION_STRING containerd.io docker-buildx-plugin docker-compose-plugin
cgroup 드라이버 구성
방법 1.
#도커 서비스 파일을 편집기로 연다
sudo vim /usr/lib/systemd/system/docker.service

#도커 서비스 파일에서 ExecStart 부분을 다음과 같이 변경
ExecStart=/usr/bin/dockerd --exec-opt native.cgroupdriver=systemd

#저장후 데몬 리로드 와 도커 재시작
sudo systemctl daemon-reload
sudo systemctl restart docker
방법2.
# daemon.jon 파일을 편집기로 연다 ( 파일이 없어도 편집기로 열면 생성 후 열림)
sudo vim /etc/docker/daemon.json

# 아래의 내용을 복사 해서 붙여넣는다
{
    "exec-opts": ["native.cgroupdriver=systemd"],
    "log-driver": "json-file",
    "log-opts": {
        "max-size": "100m"
    },
    "storage-driver": "overlay2"
}

# 도커 서비스 디렉토리를 만든다
sudo mkdir -p /etc/systemd/system/docker.service.d

#데몬과 도커 재시작
sudo systemctl daemon-reload
sudo systemctl restart docker
K8S 설치(kubeadm)
# apt 패키지 색인을 업데이트하고, 쿠버네티스 apt 리포지터리를 사용하는 데 필요한 패키지를 설치한다.
sudo apt-get update
sudo apt-get install -y apt-transport-https ca-certificates curl

#구글 클라우드의 공개 사이닝 키를 다운로드 한다.
sudo curl -fsSLo /usr/share/keyrings/kubernetes-archive-keyring.gpg https://packages.cloud.google.com/apt/doc/apt-key.gpg

#쿠버네티스 apt 리포지터리를 추가한다.
echo "deb [signed-by=/usr/share/keyrings/kubernetes-archive-keyring.gpg] https://apt.kubernetes.io/ kubernetes-xenial main" | sudo tee /etc/apt/sources.list.d/kubernetes.list

#apt 패키지 색인을 업데이트하고, kubelet, kubeadm, kubectl을 설치하고 해당 버전을 고정한다.
sudo apt-get update
sudo apt-get install -y kubelet kubeadm kubectl
sudo apt-mark hold kubelet kubeadm kubectl
K8s 클러스터 구성
# 처음부터 kubeadm init을 하면 CRI 에러가 뜰 것이다
# 처음에 도커를 설치하면 containerd가 disabled 비활성화 되어있기 때문이다

# CRI 실행
# containerd/config.toml 파일을 연다
vim /etc/containerd/config.toml

# disabled_plugins = ["CRI"] 에서 CRI를 지워준다
disabled_plugins = []

#컨테이너 재시작후 클러스터를 구성한다
systemctl restart containerd


# 마스터 노드에서
kubeadm  init --apiserver-advertise-address 192.168.47.128 # master ip 번호

#init을 하면 이렇게 출력 된다
#Your Kubernetes control-plane has initialized successfully!

#To start using your cluster, you need to run the following as a regular user:

mkdir -p $HOME/.kube # <-- master node 실행

sudo cp -i /etc/kubernetes/admin.conf $HOME/.kube/config # <-- master node 실행

sudo chown $(id -u):$(id -g) $HOME/.kube/config  #<-- master node 실행

#Alternatively, if you are the root user, you can run:

export KUBECONFIG=/etc/kubernetes/admin.conf  # <-- master node 실행

#You should now deploy a pod network to the cluster.

#Run "kubectl apply -f [podnetwork].yaml" with one of the options listed at:

#[Installing Addons](https://kubernetes.io/docs/concepts/cluster-administration/addons/)

#!https://kubernetes.io/images/favicon.png

#Then you can join any number of worker nodes by running the following on each as root:

kubeadm join 192.168.47.128:6443 --token jof46p.x6spb7sm48bctxzh \

--discovery-token-ca-cert-hash sha256:76aeaf819d294a394c230e6dd960f2912062201fdb33e2bd8e3009cd0fd81d28

#위에 join 부분을 워커에서 실행
에드온 설치
weave Net : https://www.weave.works/docs/net/latest/kubernetes/kube-addon/
# 먼저 클러스터가 정상적으로 구성 되어있는지 확인 한다
kubectl get nodes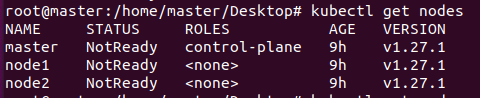
# weave 에드온을 설치한다
kubectl apply -f https://github.com/weaveworks/weave/releases/download/v2.8.1/weave-daemonset-k8s.yaml

# 설치 후 노드가 ready 상태가 되는지 확인 한다
kubectl get nodes
kubebench 점검
# kubebench.yaml
---
apiVersion: batch/v1
kind: Job
metadata:
  name: kube-bench
spec:
  template:
    metadata:
      labels:
        app: kube-bench
    spec:
      hostPID: true
      containers:
        - name: kube-bench
          image: aquasec/kube-bench:0.6.3
          command: ["kube-bench"]
          volumeMounts:
            - name: var-lib-etcd
              mountPath: /var/lib/etcd
              readOnly: true
            - name: var-lib-kubelet
              mountPath: /var/lib/kubelet
              readOnly: true
            - name: var-lib-kube-scheduler
              mountPath: /var/lib/kube-scheduler
              readOnly: true
            - name: var-lib-kube-controller-manager
              mountPath: /var/lib/kube-controller-manager
              readOnly: true
            - name: etc-systemd
              mountPath: /etc/systemd
              readOnly: true
            - name: lib-systemd
              mountPath: /lib/systemd/
              readOnly: true
            - name: srv-kubernetes
              mountPath: /srv/kubernetes/
              readOnly: true
            - name: etc-kubernetes
              mountPath: /etc/kubernetes
              readOnly: true
              # /usr/local/mount-from-host/bin is mounted to access kubectl / kubelet, for auto-detecting the Kubernetes version.
              # You can omit this mount if you specify --version as part of the command.
            - name: usr-bin
              mountPath: /usr/local/mount-from-host/bin
              readOnly: true
            - name: etc-cni-netd
              mountPath: /etc/cni/net.d/
              readOnly: true
            - name: opt-cni-bin
              mountPath: /opt/cni/bin/
              readOnly: true
      restartPolicy: Never
      volumes:
        - name: var-lib-etcd
          hostPath:
            path: "/var/lib/etcd"
        - name: var-lib-kubelet
          hostPath:
            path: "/var/lib/kubelet"
        - name: var-lib-kube-scheduler
          hostPath:
            path: "/var/lib/kube-scheduler"
        - name: var-lib-kube-controller-manager
          hostPath:
            path: "/var/lib/kube-controller-manager"
        - name: etc-systemd
          hostPath:
            path: "/etc/systemd"
        - name: lib-systemd
          hostPath:
            path: "/lib/systemd"
        - name: srv-kubernetes
          hostPath:
            path: "/srv/kubernetes"
        - name: etc-kubernetes
          hostPath:
            path: "/etc/kubernetes"
        - name: usr-bin
          hostPath:
            path: "/usr/bin"
        - name: etc-cni-netd
          hostPath:
            path: "/etc/cni/net.d/"
        - name: opt-cni-bin
          hostPath:
            path: "/opt/cni/bin/"
kubebench 실행
# kubebench 실행
kubectl apply -f kubebench.yaml

#kubebench가 정상 작동 하는지 확인
kubectl get pods

Status 에 Completed 이라고 떠있으면 성공
벤치 진단 결과 확인
# 벤치 진단 결과 확인
kubectl logs kube-bench-gsqnq

root@master:/home/master/Desktop# kubectl logs kube-bench-gsqnq
[INFO] 4 Worker Node Security Configuration
[INFO] 4.1 Worker Node Configuration Files
[FAIL] 4.1.1 Ensure that the kubelet service file permissions are set to 600 or more restrictive (Automated)
[PASS] 4.1.2 Ensure that the kubelet service file ownership is set to root:root (Automated)
[PASS] 4.1.3 If proxy kubeconfig file exists ensure permissions are set to 600 or more restrictive (Manual)
[PASS] 4.1.4 If proxy kubeconfig file exists ensure ownership is set to root:root (Manual)
[PASS] 4.1.5 Ensure that the --kubeconfig kubelet.conf file permissions are set to 600 or more restrictive (Automated)
[PASS] 4.1.6 Ensure that the --kubeconfig kubelet.conf file ownership is set to root:root (Automated)
[WARN] 4.1.7 Ensure that the certificate authorities file permissions are set to 600 or more restrictive (Manual)
[PASS] 4.1.8 Ensure that the client certificate authorities file ownership is set to root:root (Manual)
[WARN] 4.1.9 If the kubelet config.yaml configuration file is being used validate permissions set to 600 or more restrictive (Manual)
[PASS] 4.1.10 If the kubelet config.yaml configuration file is being used validate file ownership is set to root:root (Manual)
[INFO] 4.2 Kubelet
[PASS] 4.2.1 Ensure that the --anonymous-auth argument is set to false (Automated)
[PASS] 4.2.2 Ensure that the --authorization-mode argument is not set to AlwaysAllow (Automated)
[PASS] 4.2.3 Ensure that the --client-ca-file argument is set as appropriate (Automated)
[PASS] 4.2.4 Verify that the --read-only-port argument is set to 0 (Manual)
[PASS] 4.2.5 Ensure that the --streaming-connection-idle-timeout argument is not set to 0 (Manual)
[FAIL] 4.2.6 Ensure that the --protect-kernel-defaults argument is set to true (Automated)
[PASS] 4.2.7 Ensure that the --make-iptables-util-chains argument is set to true (Automated)
[PASS] 4.2.8 Ensure that the --hostname-override argument is not set (Manual)
[WARN] 4.2.9 Ensure that the eventRecordQPS argument is set to a level which ensures appropriate event capture (Manual)
[WARN] 4.2.10 Ensure that the --tls-cert-file and --tls-private-key-file arguments are set as appropriate (Manual)
[PASS] 4.2.11 Ensure that the --rotate-certificates argument is not set to false (Automated)
[PASS] 4.2.12 Verify that the RotateKubeletServerCertificate argument is set to true (Manual)
[WARN] 4.2.13 Ensure that the Kubelet only makes use of Strong Cryptographic Ciphers (Manual)

== Remediations node ==
4.1.1 Run the below command (based on the file location on your system) on the each worker node.
For example, chmod 600 /etc/systemd/system/kubelet.service.d/10-kubeadm.conf

4.1.7 Run the following command to modify the file permissions of the
--client-ca-file chmod 600 <filename>

4.1.9 Run the following command (using the config file location identified in the Audit step)
chmod 600 /var/lib/kubelet/config.yaml

4.2.6 If using a Kubelet config file, edit the file to set `protectKernelDefaults` to `true`.
If using command line arguments, edit the kubelet service file
/etc/systemd/system/kubelet.service.d/10-kubeadm.conf on each worker node and
set the below parameter in KUBELET_SYSTEM_PODS_ARGS variable.
--protect-kernel-defaults=true
Based on your system, restart the kubelet service. For example:
systemctl daemon-reload
systemctl restart kubelet.service

4.2.9 If using a Kubelet config file, edit the file to set `eventRecordQPS` to an appropriate level.
If using command line arguments, edit the kubelet service file
/etc/systemd/system/kubelet.service.d/10-kubeadm.conf on each worker node and
set the below parameter in KUBELET_SYSTEM_PODS_ARGS variable.
Based on your system, restart the kubelet service. For example,
systemctl daemon-reload
systemctl restart kubelet.service

4.2.10 If using a Kubelet config file, edit the file to set `tlsCertFile` to the location
of the certificate file to use to identify this Kubelet, and `tlsPrivateKeyFile`
to the location of the corresponding private key file.
If using command line arguments, edit the kubelet service file
/etc/systemd/system/kubelet.service.d/10-kubeadm.conf on each worker node and
set the below parameters in KUBELET_CERTIFICATE_ARGS variable.
--tls-cert-file=<path/to/tls-certificate-file>
--tls-private-key-file=<path/to/tls-key-file>
Based on your system, restart the kubelet service. For example,
systemctl daemon-reload
systemctl restart kubelet.service

4.2.13 If using a Kubelet config file, edit the file to set `TLSCipherSuites` to
TLS_ECDHE_ECDSA_WITH_AES_128_GCM_SHA256,TLS_ECDHE_RSA_WITH_AES_128_GCM_SHA256,TLS_ECDHE_ECDSA_WITH_CHACHA20_POLY1305,TLS_ECDHE_RSA_WITH_AES_256_GCM_SHA384,TLS_ECDHE_RSA_WITH_CHACHA20_POLY1305,TLS_ECDHE_ECDSA_WITH_AES_256_GCM_SHA384,TLS_RSA_WITH_AES_256_GCM_SHA384,TLS_RSA_WITH_AES_128_GCM_SHA256
or to a subset of these values.
If using executable arguments, edit the kubelet service file
/etc/systemd/system/kubelet.service.d/10-kubeadm.conf on each worker node and
set the --tls-cipher-suites parameter as follows, or to a subset of these values.
--tls-cipher-suites=TLS_ECDHE_ECDSA_WITH_AES_128_GCM_SHA256,TLS_ECDHE_RSA_WITH_AES_128_GCM_SHA256,TLS_ECDHE_ECDSA_WITH_CHACHA20_POLY1305,TLS_ECDHE_RSA_WITH_AES_256_GCM_SHA384,TLS_ECDHE_RSA_WITH_CHACHA20_POLY1305,TLS_ECDHE_ECDSA_WITH_AES_256_GCM_SHA384,TLS_RSA_WITH_AES_256_GCM_SHA384,TLS_RSA_WITH_AES_128_GCM_SHA256
Based on your system, restart the kubelet service. For example:
systemctl daemon-reload
systemctl restart kubelet.service


== Summary node ==
16 checks PASS
2 checks FAIL
5 checks WARN
0 checks INFO

[INFO] 5 Kubernetes Policies
[INFO] 5.1 RBAC and Service Accounts
[WARN] 5.1.1 Ensure that the cluster-admin role is only used where required (Manual)
[WARN] 5.1.2 Minimize access to secrets (Manual)
[WARN] 5.1.3 Minimize wildcard use in Roles and ClusterRoles (Manual)
[WARN] 5.1.4 Minimize access to create pods (Manual)
[WARN] 5.1.5 Ensure that default service accounts are not actively used. (Manual)
[WARN] 5.1.6 Ensure that Service Account Tokens are only mounted where necessary (Manual)
[WARN] 5.1.7 Avoid use of system:masters group (Manual)
[WARN] 5.1.8 Limit use of the Bind, Impersonate and Escalate permissions in the Kubernetes cluster (Manual)
[INFO] 5.2 Pod Security Standards
[WARN] 5.2.1 Ensure that the cluster has at least one active policy control mechanism in place (Manual)
[WARN] 5.2.2 Minimize the admission of privileged containers (Manual)
[WARN] 5.2.3 Minimize the admission of containers wishing to share the host process ID namespace (Automated)
[WARN] 5.2.4 Minimize the admission of containers wishing to share the host IPC namespace (Automated)
[WARN] 5.2.5 Minimize the admission of containers wishing to share the host network namespace (Automated)
[WARN] 5.2.6 Minimize the admission of containers with allowPrivilegeEscalation (Automated)
[WARN] 5.2.7 Minimize the admission of root containers (Automated)
[WARN] 5.2.8 Minimize the admission of containers with the NET_RAW capability (Automated)
[WARN] 5.2.9 Minimize the admission of containers with added capabilities (Automated)
[WARN] 5.2.10 Minimize the admission of containers with capabilities assigned (Manual)
[WARN] 5.2.11 Minimize the admission of Windows HostProcess containers (Manual)
[WARN] 5.2.12 Minimize the admission of HostPath volumes (Manual)
[WARN] 5.2.13 Minimize the admission of containers which use HostPorts (Manual)
[INFO] 5.3 Network Policies and CNI
[WARN] 5.3.1 Ensure that the CNI in use supports NetworkPolicies (Manual)
[WARN] 5.3.2 Ensure that all Namespaces have NetworkPolicies defined (Manual)
[INFO] 5.4 Secrets Management
[WARN] 5.4.1 Prefer using Secrets as files over Secrets as environment variables (Manual)
[WARN] 5.4.2 Consider external secret storage (Manual)
[INFO] 5.5 Extensible Admission Control
[WARN] 5.5.1 Configure Image Provenance using ImagePolicyWebhook admission controller (Manual)
[INFO] 5.7 General Policies
[WARN] 5.7.1 Create administrative boundaries between resources using namespaces (Manual)
[WARN] 5.7.2 Ensure that the seccomp profile is set to docker/default in your Pod definitions (Manual)
[WARN] 5.7.3 Apply SecurityContext to your Pods and Containers (Manual)
[WARN] 5.7.4 The default namespace should not be used (Manual)

== Remediations policies ==
5.1.1 Identify all clusterrolebindings to the cluster-admin role. Check if they are used and
if they need this role or if they could use a role with fewer privileges.
Where possible, first bind users to a lower privileged role and then remove the
clusterrolebinding to the cluster-admin role :
kubectl delete clusterrolebinding [name]

5.1.2 Where possible, remove get, list and watch access to Secret objects in the cluster.

5.1.3 Where possible replace any use of wildcards in clusterroles and roles with specific
objects or actions.

5.1.4 Where possible, remove create access to pod objects in the cluster.

5.1.5 Create explicit service accounts wherever a Kubernetes workload requires specific access
to the Kubernetes API server.
Modify the configuration of each default service account to include this value
automountServiceAccountToken: false

5.1.6 Modify the definition of pods and service accounts which do not need to mount service
account tokens to disable it.

5.1.7 Remove the system:masters group from all users in the cluster.

5.1.8 Where possible, remove the impersonate, bind and escalate rights from subjects.

5.2.1 Ensure that either Pod Security Admission or an external policy control system is in place
for every namespace which contains user workloads.

5.2.2 Add policies to each namespace in the cluster which has user workloads to restrict the
admission of privileged containers.

5.2.3 Add policies to each namespace in the cluster which has user workloads to restrict the
admission of `hostPID` containers.

5.2.4 Add policies to each namespace in the cluster which has user workloads to restrict the
admission of `hostIPC` containers.

5.2.5 Add policies to each namespace in the cluster which has user workloads to restrict the
admission of `hostNetwork` containers.

5.2.6 Add policies to each namespace in the cluster which has user workloads to restrict the
admission of containers with `.spec.allowPrivilegeEscalation` set to `true`.

5.2.7 Create a policy for each namespace in the cluster, ensuring that either `MustRunAsNonRoot`
or `MustRunAs` with the range of UIDs not including 0, is set.

5.2.8 Add policies to each namespace in the cluster which has user workloads to restrict the
admission of containers with the `NET_RAW` capability.

5.2.9 Ensure that `allowedCapabilities` is not present in policies for the cluster unless
it is set to an empty array.

5.2.10 Review the use of capabilites in applications running on your cluster. Where a namespace
contains applicaions which do not require any Linux capabities to operate consider adding
a PSP which forbids the admission of containers which do not drop all capabilities.

5.2.11 Add policies to each namespace in the cluster which has user workloads to restrict the
admission of containers that have `.securityContext.windowsOptions.hostProcess` set to `true`.

5.2.12 Add policies to each namespace in the cluster which has user workloads to restrict the
admission of containers with `hostPath` volumes.

5.2.13 Add policies to each namespace in the cluster which has user workloads to restrict the
admission of containers which use `hostPort` sections.

5.3.1 If the CNI plugin in use does not support network policies, consideration should be given to
making use of a different plugin, or finding an alternate mechanism for restricting traffic
in the Kubernetes cluster.

5.3.2 Follow the documentation and create NetworkPolicy objects as you need them.

5.4.1 If possible, rewrite application code to read Secrets from mounted secret files, rather than
from environment variables.

5.4.2 Refer to the Secrets management options offered by your cloud provider or a third-party
secrets management solution.

5.5.1 Follow the Kubernetes documentation and setup image provenance.

5.7.1 Follow the documentation and create namespaces for objects in your deployment as you need
them.

5.7.2 Use `securityContext` to enable the docker/default seccomp profile in your pod definitions.
An example is as below:
  securityContext:
    seccompProfile:
      type: RuntimeDefault

5.7.3 Follow the Kubernetes documentation and apply SecurityContexts to your Pods. For a
suggested list of SecurityContexts, you may refer to the CIS Security Benchmark for Docker
Containers.

5.7.4 Ensure that namespaces are created to allow for appropriate segregation of Kubernetes
resources and that all new resources are created in a specific namespace.


== Summary policies ==
0 checks PASS
0 checks FAIL
30 checks WARN
0 checks INFO

== Summary total ==
16 checks PASS
2 checks FAIL
35 checks WARN
0 checks INFO
FAIL이 2건이 있고 해결 방법은
1.Ensure that the kubelet service file permissions are set to 600 or more restrictive (Automated)
-각 워커노드에서
chmod 600 /etc/systemd/system/kubelet.service.d/kubeadm.conf
2.Ensure that the --protect-kernel-defaults argument is set to true (Automated)
-각 워커노드에서
vim /etc/systemd/system/kubelet.service.d/10-kubeadm.conf 열어서
KUBELET_SYSTEM_PODS_ARGS 변수에 아래
--protect-kernel-defaults=true
매개변수를 설정하고 데몬과 kubelet 리로드 및 재실행
systemctl daemon-reload
systemctl restart kubelet.service